Installing the GIT version
Important note: the current Git version contains 1 main branch:
2024-06: that contains the code of the GAMA alpha (GAMA 2024-06) (it works with JDK 23 and Eclipse 2025-03).
Changes made to other branches won't be added to the next GAMA release.
The following tutorial describes the installation for this version.
Install Eclipse 2025-03
Download the "Eclipse IDE for Java and DSL Developers 2025-03". You can also use the Eclipse launcher and choose to install the Eclipse IDE for Java and DSL Developers version. This is the latest version under which GAMA is certified to work.
Note: Regarding Java, Eclipse embeds the Adoptium (ex Adopt-OpenJDK) 23 hotspot, which is the recommended version for GAMA, you may be able to use another one, but we won't fix any related issue.
Install GAMA source code
The source is to be downloaded from GitHub in two steps: by creating a local clone of the GitHub repository and then importing the different projects that constitute GAMA into the Eclipse workspace.
- Open the Git perspective:
- Windows > Perspective > Open Perspective > Other...
- Choose
Git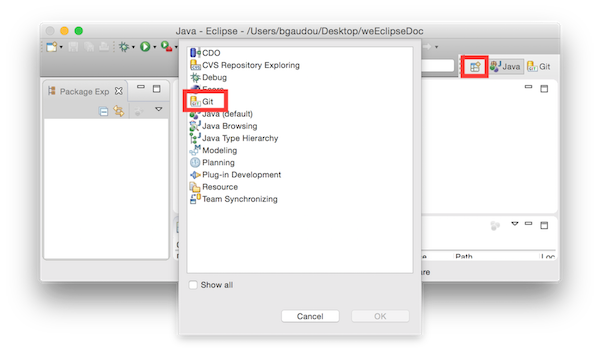
- Click on "Clone a Git repository"
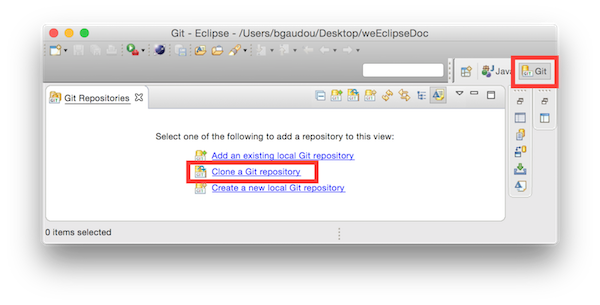
- In Source Git repository window:
- Fill in the URI label with:
https://github.com/gama-platform/gama.git - Other fields will be automatically filled in.
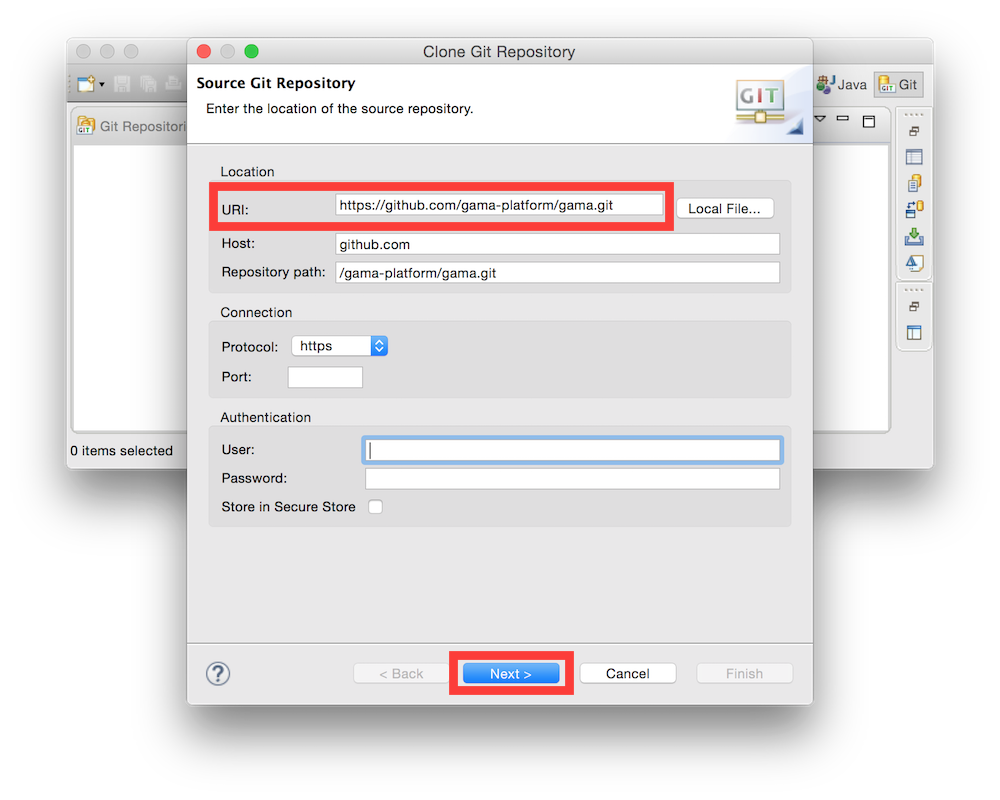
- Fill in the URI label with:
- In Branch Selection windows,
- check the
2024-06branch - Next
- check the
- In Local Destination windows,
- Choose a Directory (where the source files will be downloaded).
- Everything else should be unchecked
- Finish
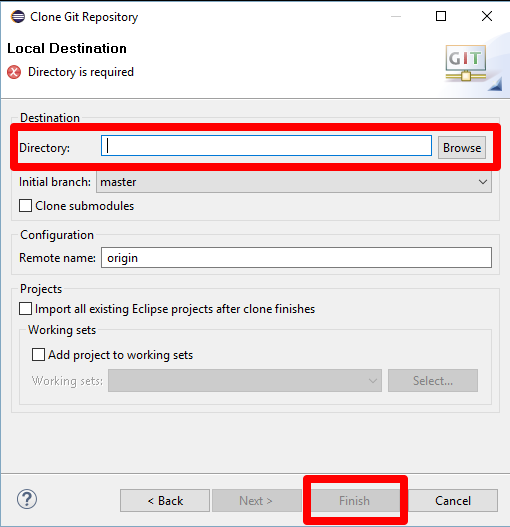
This can take a while...
Import projects into workspace
You have now to import projects into the workspace (notice that the folders downloaded during the clone will neither be copied nor moved).
Note: contrarily to previous Eclipse versions, import project from the Git perspective does not work properly for GAMA.
- In the Java perspective, choose:
File/Import...,
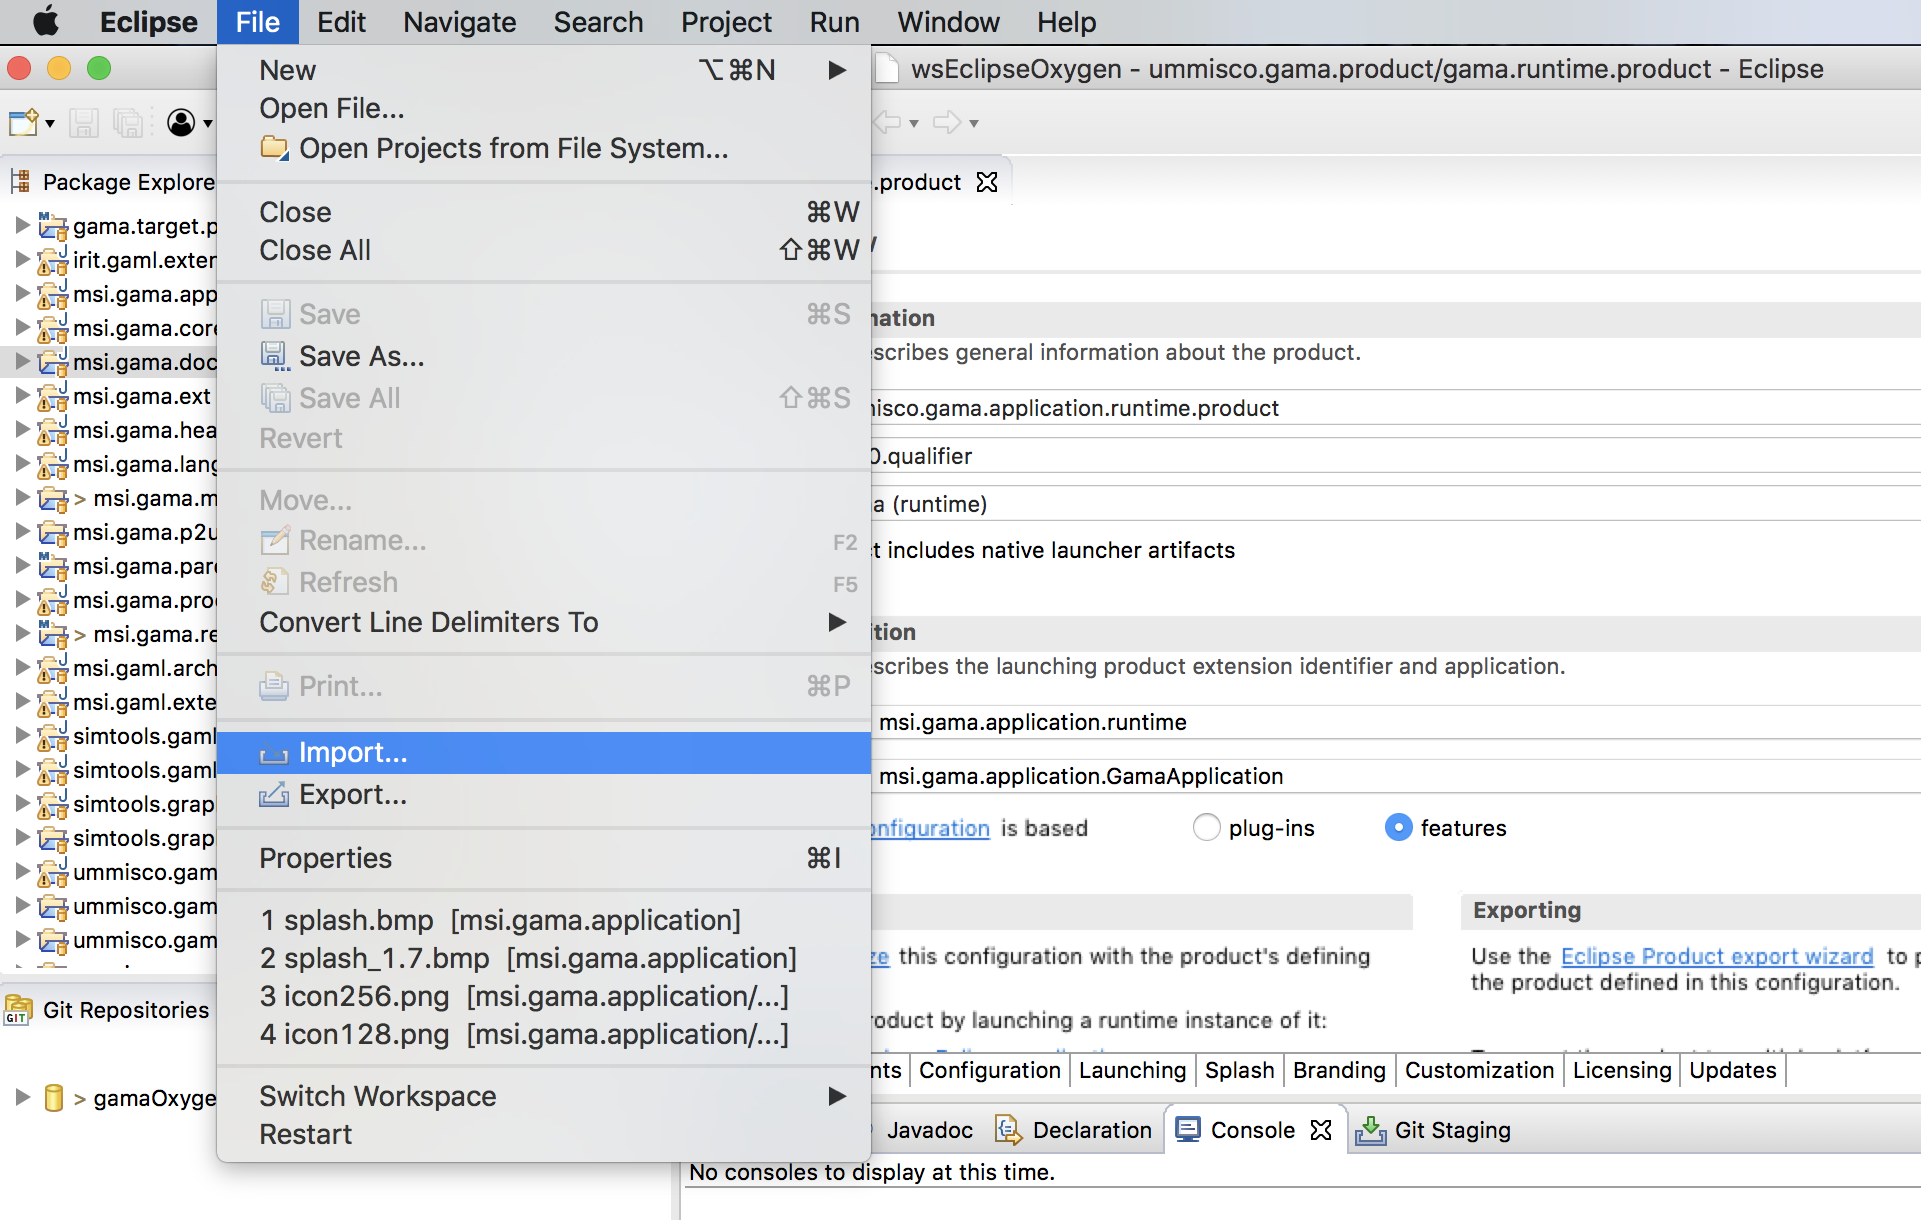
- In the install window, select
Git/Projects from Git, - Click on Next,
- In the
Project from Gitwindow, selectExisting local repository.,
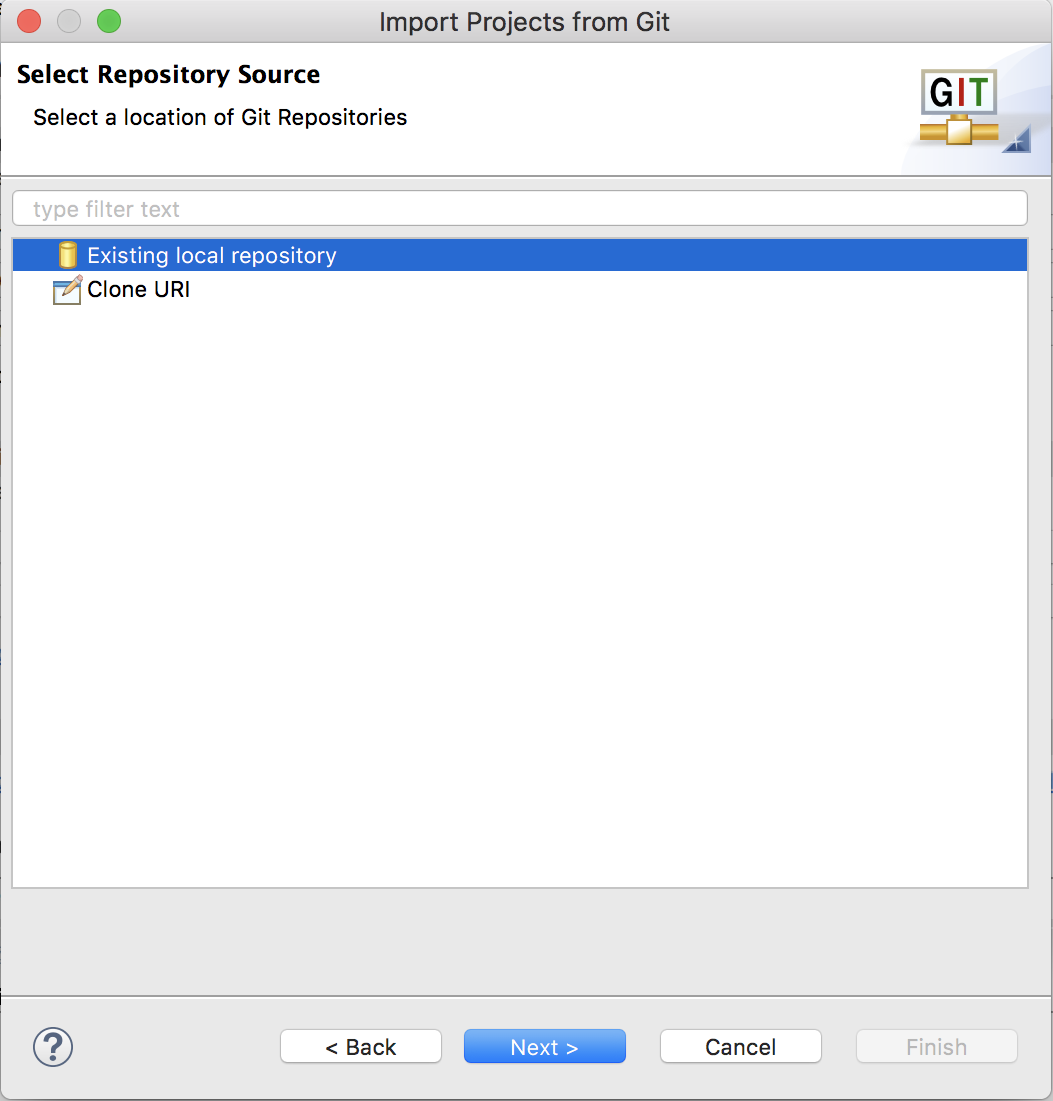
- Click on Next,
- In the new window, select your Git repository,
- Click on Next,
- In the Select a wizard to used to import projects, check that
- Import existing Eclipse projects is selected
- Working Tree is selected
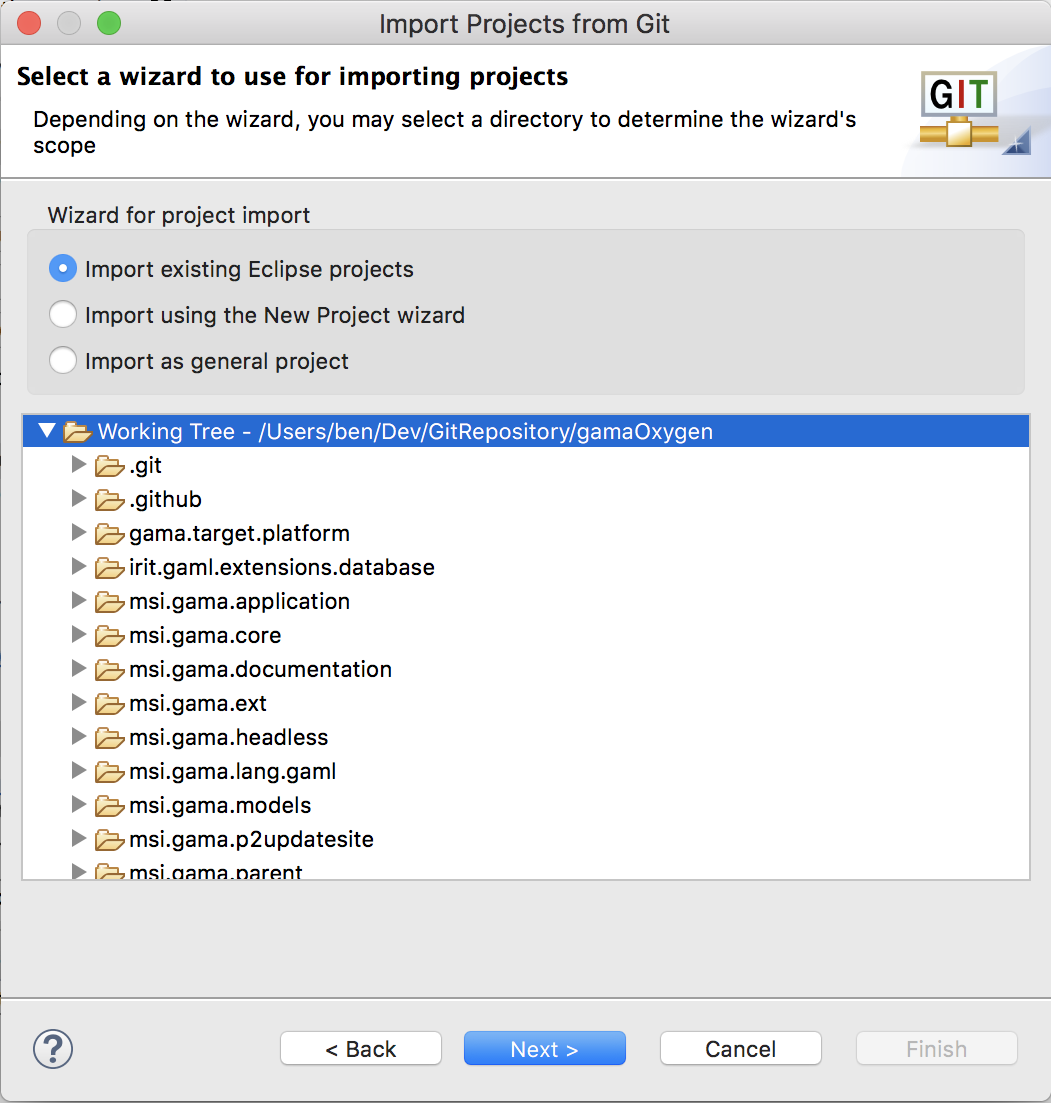
-
Click on Next,
-
In the Import project window,
- Uncheck Search for nested projects
- Select all the projects
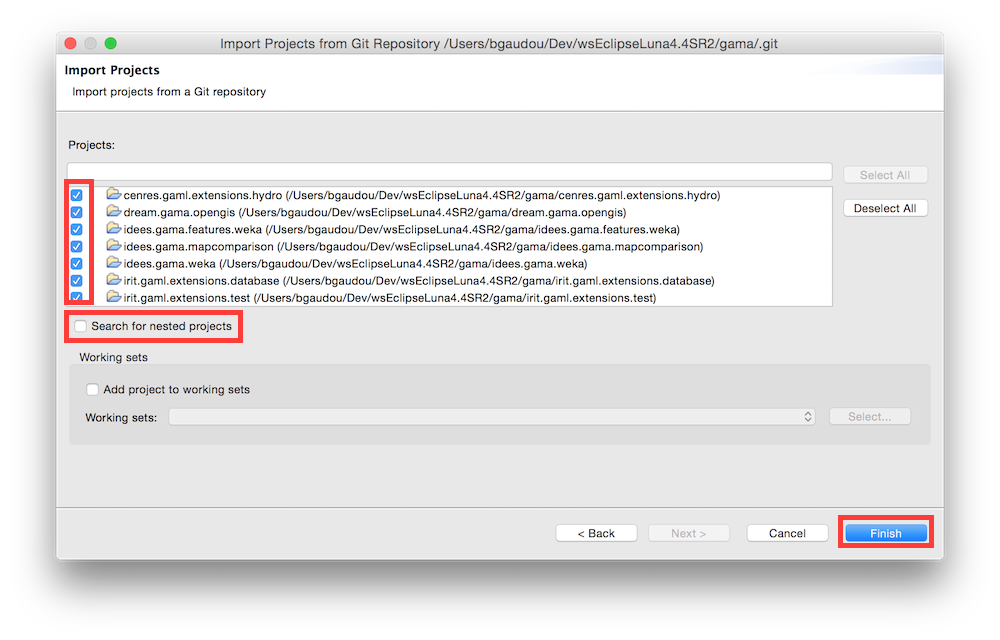
-
Finish
- Clean project (Project menu > Clean ...)
If you have errors...
If errors continue to show in the different projects, be sure to correctly set the JDK used in the Eclipse preferences. GAMA (version 2024-06) is targeting JDK 17, and Eclipse could produce errors if it did not find in your environment. So, either you set the compatibility to 17 by default (in Preferences > Java > Compiler > Compiler Compliance Level) or you change the error produced by Eclipse to a warning only (in Preferences > Java > Compiler > Building > "No strictly compatible JRE for execution environment available).
On Windows : if the project still do not compile, try to add the vm argument in eclipse.ini files (inside the directory where your eclipse is installed) before the -startup line Example :
-vm

C:\Program Files\Java\JDK21\bin

-startup

.....
Run GAMA
- Be sure to be in the Java Perspective (top right button)
- In the
ummisco.gama.productplugin, open thegama.productfile (gama.headless.productis used to produce the headless). - Go to "Overview" tab and click on Synchronize
- Click on "Launch an Eclipse Application"
GIT Tutorials
For those who want to learn more about Git and Egit, please consult the following tutorials/papers
- EGIT/User Guide http://wiki.eclipse.org/EGit/User_Guide
- Git version control with Eclipse (EGIT) - Tutorial http://www.vogella.com/tutorials/EclipseGit/article.html
- 10 things I hate about Git http://stevebennett.me/2012/02/24/10-things-i-hate-about-git/
- Learn Git and GitHub Tutorial https://www.youtube.com/playlist?list=PL1F56EA413018EEE1